CNIC Photo Size – How Big Should They Be?
You’ve filled out an online application and got down to the step where you need to add your photo. However, when you click upload, you receive an error.
Perhaps it’s because the file is too big, the wrong format or the photo is the wrong size.
Don’t worry, you’re not alone.
Knowing what size your CNIC photo should be can help avoid any issues with uploading your photo multiple times, editing it and causing delays.
NADRA are often the first thing that come to mind when thinking about services related to your CNIC in Pakistan. However, other services such as Universities, Employers, Banks and more will sometimes ask for a photo or scanned version of your ID.
However, each service will have their own requirements.
Below we’ll explain how to make sure your photo is the right size, what the pixel and KB restrictions are, the right format and how to resolve common issues.
What Size Should My CNIC Photo Be?
The required CNIC photo size will depend on the application you are using.
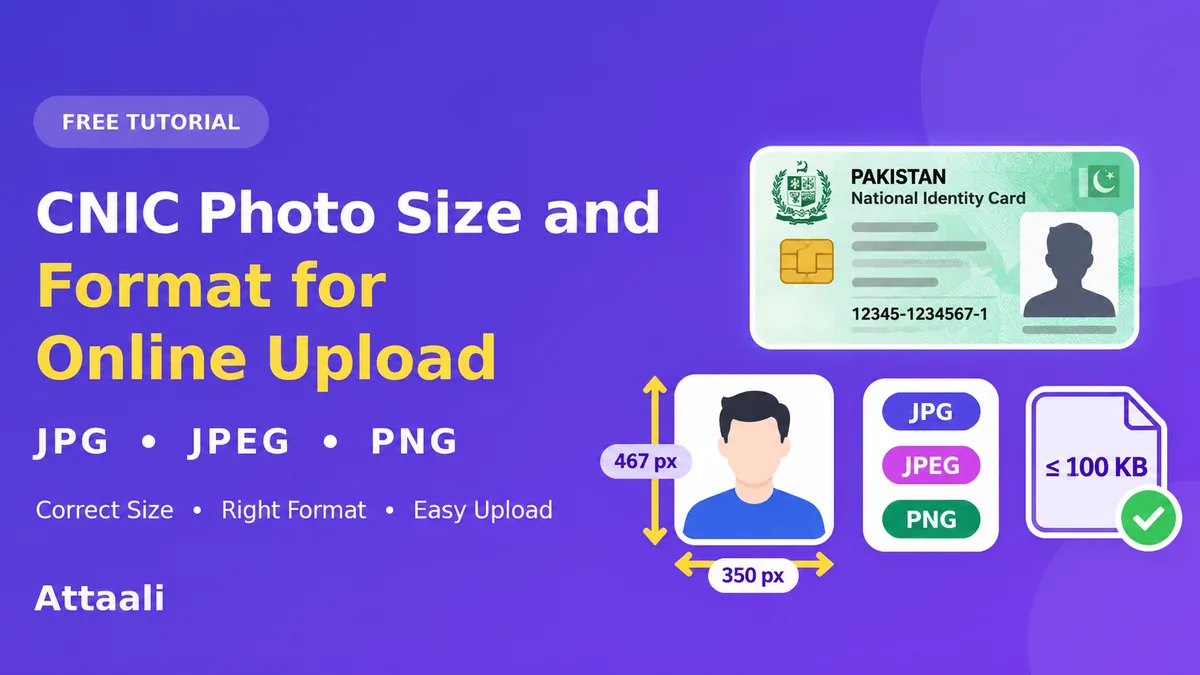
Older NADRA Pak-Identity photo guidelines state that the photo should be a portrait image with a minimum size of 350 x 467 pixels. The background should also be white.
However, this may not be the case anymore.
NADRA may now use a live photo capture option for their PakID services. However, there may still be an option to upload or capture.
Universities may ask for a certain pixel size whilst recruitment sites may ask for a maximum file size.
Before you start editing your photo, check the guidelines on the application page.
Look out for the following:
- Image size
- File type
- Maximum file size
This will help ensure you are using the correct size.
What Does 350 x 467 Pixels Mean?
Pixels are small squares that make up your digital image.
When a site asks for a 350 x 467 pixel image, it means your image should be 350 pixels wide and 467 pixels high.
This will make your image a portrait.
Other portals may ask for different sizes.
You may also find some sites ask for a size in centimetres or millimetres.
This will be the actual size of your image. However, to convert this to pixels you would need to know the resolution, usually in DPI.
In general, knowing the pixel size will help when uploading your image online. However, some portals may ask for a certain size.
Don’t assume that all passport or CNIC photos have the same size.
Always make sure to match the exact size.
How Small Should My CNIC Photo Be in KB?
Image size and file size are completely different.
Image size refers to the width and height of your image. File size refers to how much space your image is taking up.
File size is usually measured in KB or MB.
Two images could have the same pixel size however, one will have a larger file size. This is due to compression and detail in the image.
Some sites will accept a larger file size whereas others will have stricter requirements.
Some sites may mention that you should have a file size of 50KB, 100KB, 200KB or something else.
This means that the portal you are trying to upload to may have different requirements. For example, if your application asks for an image under 100KB you must ensure that your file size matches this.
Try not to over-compress your image.
Too much compression can cause your face to become blurry and distorted.
Only compress your image if you need it to be a smaller size. However, try to ensure it is still clear enough.
What Format Should My Photo Be In?
The format refers to how your image is stored.
JPG or JPEG is a good format to use for many online application systems.
Both extensions refer to the same image format. This format allows the image to be compressed well and works well with most websites.
Another common format is PNG.
This format can keep your images detailed however, the images may take up more storage. Some portals may allow you to use this format whilst others will only allow you to use JPG or JPEG.
Make sure to check what file types are accepted.
If a site specifically asks for JPEG, make sure to save your image in this format.
Renaming a .png file to .jpg won’t change the format of your image. Instead, use an image converter.
What Should My CNIC Application Photo Be Like?
Even if you have the correct file, your image may not be suitable. When applying for something related to your identity, you need to have a clear image of your face.
NADRA have guidelines for images. They state that your image should be simple, facing the front, clear facial features and correct lighting.
A simple white or plain background is a good idea when creating a portrait image. However, ensure that it matches the current guidelines.
Face the camera and ensure your face is clear.
Ensure that there aren’t any harsh shadows, overly bright and anything distracting in the background.
Avoid using beauty filters or anything that changes your appearance.
Your image should show what you actually look like.
If your application uses a live camera, follow the guidelines for the image.
How To Resize Your CNIC Photo
If your application is asking for a certain image size however your phone is producing a far larger image, you may not need to take a new photo. You can resize your image.
Ensure that your image is clear and that the application allows pre-uploaded images.
Open your image in a trusted image editor.
Look for the resize or image size option.
Add in the required width and height in pixels.
Be careful when resizing your image. If you try to make a wide image into a slim portrait your face may look stretched.
Instead, crop your image to the correct size. Ensure your face is central and not cut off.
Once complete, save your image in the format asked for on the portal.
Check that your image has the correct size.
How To Compress Your CNIC Photo
Sometimes your image may be the correct size however it is too big in KB. This can be resolved by compressing your image.
JPEG compression will reduce the file size by removing some of the information from your image.
This can be done with a moderate amount of compression to reduce the size of your image with no noticeable issues.
However, if you over-compress your image you may lose the quality.
Start with a high quality image and reduce the size slightly. After each time, check your eyes, face and other important details.
If your image is becoming blurry or pixelated, you’ve probably gone too far.
Avoid saving your image multiple times with a lower quality. Instead, use the original image.
As these images are related to your identity, try using a trusted offline image editor.
How To Check Image Size On Mobile And Computer
You can usually check the size of your image without needing to download any software.
On a Windows computer you can right-click on your image and select Properties.
Under the Details tab you can find out the pixel size. Under the General tab you can find out the file size.
On a smartphone this will depend on your device and gallery. Many gallery/image management apps will have a Details or Information option.
This may give you the size of your image, type and storage.
If your image is in the incorrect format, use a trusted image converter. Check this only takes a few seconds and can help avoid any issues.
Why Is My CNIC Photo Not Uploading?
Sometimes your image may not be acceptable. However, this could be due to technical issues.
Your image could be too big, the wrong format, incorrect size or you may have an unstable internet connection.
Sometimes your application may require you to use a live camera. Check the error message to see what the issue may be.
Check if the portal requires a maximum file size or specific file type. Ensure that your file will open on your device. Try using a supported browser. If needed, update the official application.
Avoid changing multiple settings.
Usually once you find out the issue you’ll be able to resolve it quickly.
Is It Safe To Upload My CNIC Photo Online?
As these images are related to your identity and CNIC, you should be cautious. Only upload them to legitimate services that have a genuine reason to ask for them.
For NADRA related applications, ensure you are using the official NADRA website or authorised PakID application.
Be wary of links sent to you unexpectedly. Just because a site looks professional doesn’t mean it is safe.
Always ensure that you are using the correct website address and know why they need your information. Avoid using unknown image editing services and asking for unnecessary personal information.
If possible, create your image on your device. Remember that a portrait image and CNIC card scan are different documents.
If the service asks for a copy of your CNIC, they may want a readable front and back image instead of a passport style image.
Final Thoughts
Creating a CNIC photo for online use doesn’t have to be complicated. As long as you know what your application requires.
Check the pixel size, image type and maximum file size. Use a clear image with good lighting. Avoid using filters and over compressing.
If your image isn’t uploading, check the file details. Follow the guidelines given on the portal.
Most importantly, don’t assume that all CNIC related services require the same photo size. Whether you are applying for an identity application, University or Employment, following the actual requirements for uploading will help avoid any delays.
Taking a few precautions can make the whole process much easier.